Quick answer
A practical veterinary lab usually needs four connected layers: sample collection and preparation, diagnostic analyzers, microscopy, and controlled reporting. Define the test menu, daily volume, turnaround target, operator skill and referral boundary before selecting equipment. The correct list is the smallest system that can produce dependable answers for the clinic's actual cases.
The most expensive laboratory is not necessarily the one with the highest equipment price. It is the one that creates repeat work, idle capacity, inconsistent results or long interruptions when a single process fails. A workflow-first plan helps a clinic decide which tests belong in house, which should remain with a reference laboratory and which capabilities can be added after demand is proven.
This guide provides a practical framework for veterinary clinics and hospitals. It does not prescribe a universal test menu or replace local regulatory, biosafety, waste or professional requirements. Use it to create a project brief that can be reviewed by clinical leaders, laboratory staff, facilities teams and equipment suppliers.
Step 1
Start With Clinical Decisions, Not Equipment Models
Begin with the patient questions the laboratory must help answer. Veterinary blood analysis, parasite review through veterinary fecal analysis, and urine sediment examination create different preparation, interpretation and turnaround requirements. List each intended test, the expected specimens, typical daily and peak volume, acceptable turnaround time and the action a clinician may take from the result.
Then map the sample journey: collection, identification, transport to the bench, preparation, analysis, result review, reporting, storage and disposal. This exposes dependencies that an equipment-only quotation can miss. For example, a rapid analyzer does not deliver a rapid service if samples queue at centrifugation, operators must re-enter patient data or quality-control material is stored in another room.
Define the in-house boundary
Keep tests in house when turnaround changes immediate care and the clinic can support consistent operation. Refer low-volume or specialist tests when external expertise and scale provide better control.
Assign an owner
Name who owns the test menu, standard procedures, training records, maintenance calendar, control review, stock levels and escalation when a result or instrument is questionable.
Turn the test menu into a launch matrix
Current equipment guides consistently list analyzers, microscopes and centrifuges. The more useful decision is when each workflow belongs in house. Use the matrix below before comparing models.
| Workflow | Strong in-house signal | Keep or send out when |
|---|---|---|
| Animal blood analysis and veterinary haematology | Same-visit results regularly change triage, treatment or pre-procedure decisions. | Volume is low, morphology review is complex or trained coverage is not available. |
| Fecal and parasite review | The clinic sees frequent screening or gastrointestinal cases and can standardize preparation. | Confirmatory methods, specialist identification or batch economics favor a reference laboratory. |
| Urine chemistry and sediment | Fresh-sample timing matters and microscopy competency is available during operating hours. | The clinic cannot maintain consistent preparation, review or quality checks. |
For a cost discussion focused on one analyzer category, separate capital price from consumables, controls, maintenance, training and staff time. Clinics planning CBC and morphology workflows can use the veterinary hematology analyzer price guide to structure that total-cost comparison before requesting quotes. Operational and product questions can also be checked against the veterinary diagnostics FAQ.
Step 2
Veterinary Lab Equipment Checklist
Use categories to make the scope complete, then specify exact models only after the workflow is agreed. This checklist is broader than the Vetsplex product range so it can serve as a project document rather than a product pitch.
| Category | Typical items to assess | Planning question |
|---|---|---|
| Sample collection | Tubes, labels, swabs, containers, needles, transport racks | Can identity and specimen type remain clear from patient to result? |
| Sample preparation | Centrifuge, pipettes, timers, mixers, slides, coverslips, staining tools | Which preparation step limits turnaround or consistency? |
| Diagnostic analysis | Blood, chemistry, urine, fecal or multi-sample analyzer workflow | Does the test menu match clinical demand and operator capacity? |
| Microscopy | Digital or optical microscope, imaging screen, reporting tools | How will images be reviewed, recorded and communicated? |
| Storage and controls | Refrigerated and room-temperature storage, control material, logs | Are temperature, expiry and lot status visible at the point of use? |
| Safety and waste | PPE, sharps, spill response, segregation, cleaning materials | Does the workflow follow applicable local requirements? |
| Data and reporting | Patient identification, result review, export, backup and access control | Can the clinic trace who produced and approved each result? |
| Continuity | Service contacts, spare consumables, referral plan, downtime procedure | What happens when equipment, power, network or stock is unavailable? |
Maintain a separate recurring-stock list for veterinary practice supplies. Equipment can be available while the service remains unusable because collection tubes, slides, controls, stains or cleaning materials are missing.
Sort each item by launch priority
Required at launch
Equipment and supplies needed to run the approved day-one test menu safely and consistently.
Add when volume grows
Capacity, automation or reporting tools justified by measured workload and staff competency.
Keep as referral
Low-volume or specialist tests that remain more reliable through an external laboratory.
Step 3
Select Diagnostic Analyzers Around the Test Menu
A veterinary IVD analyzer should be evaluated as part of a complete service: specimen types, preparation steps, operator actions, reporting, controls, consumables, maintenance, training and support. Ask suppliers to demonstrate the exact in-clinic veterinary testing workflow, including abnormal or rejected samples rather than only an ideal demonstration specimen.
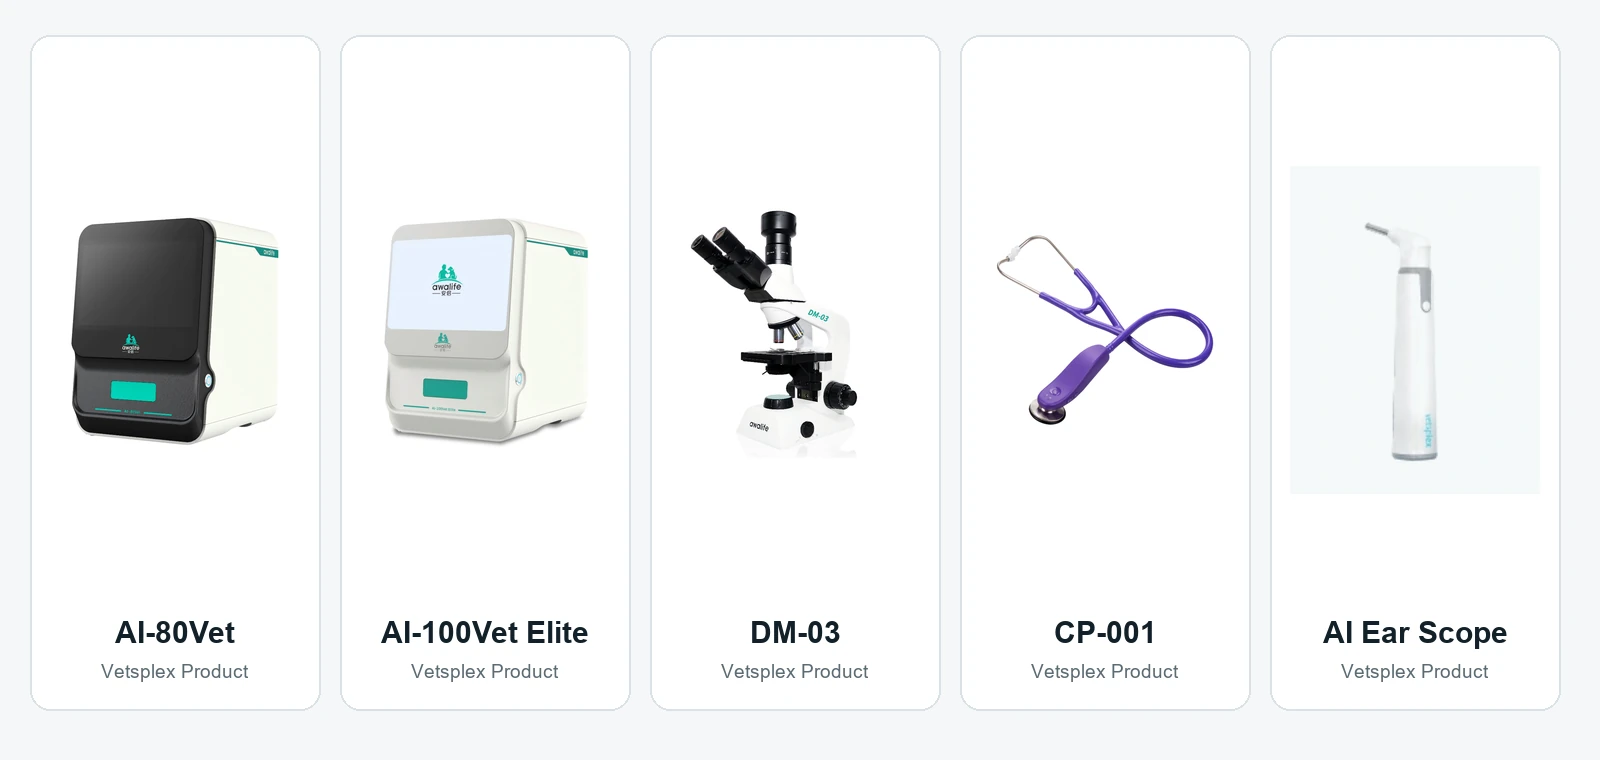
Within the current Vetsplex range, the AI-80Vet is described as a compact in-vitro diagnostic analyzer that supports automated analysis of blood, feces, intestinal fluid and urine using microfluidic control, AI-driven image recognition and automatic report generation. The AI-100Vet Elite is positioned for multi-sample veterinary analysis with additional morphology-oriented reporting capabilities. These statements describe the documented product scope; a purchase review should still confirm the exact assays, consumables, local applicability and operating requirements for the intended market.
Ask for a workflow demonstration
Bring representative sample types, expected volume and reporting needs into the review. Record hands-on time, preparation steps, repeat conditions, cleaning, result approval, consumable storage and the support route for an interrupted run.
Step 4
Plan Microscopy and Sample Preparation as One Station
Microscopy performance depends on what happens before the image is viewed. Slide quality, sample concentration, staining, timing, cleanliness and operator technique all influence the result. Place preparation tools close enough to reduce handling but separate clean storage and electronic equipment from splash, stain and waste risks.
Make image review part of the record
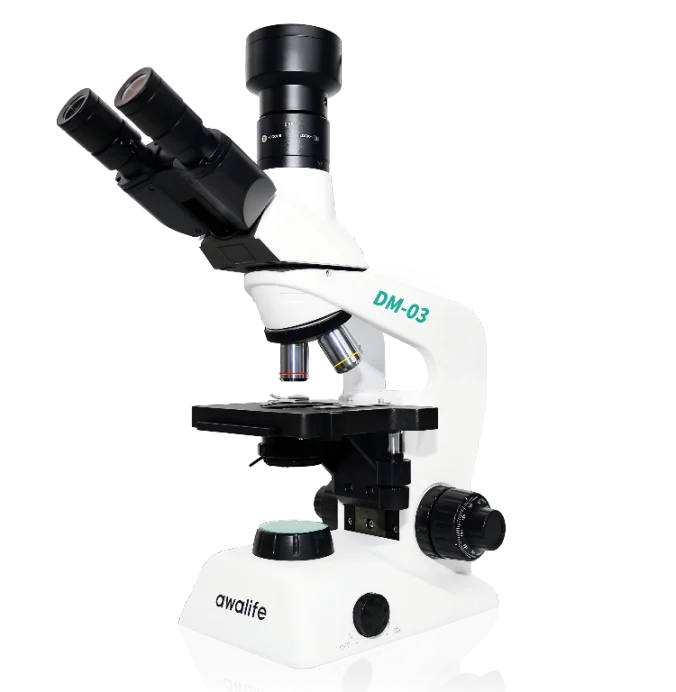
The DM-03 veterinary digital microscope is documented with PC connectivity, live image transmission, annotation, screenshot capture and template-based report generation. When reviewing a digital microscope, test how those functions fit patient identification, clinician review and record retention rather than judging image display in isolation.
For centrifuges, pipettes and other preparation equipment, specify the intended specimen, capacity, speed or volume range, cleaning procedure and calibration or verification approach. Avoid choosing a preparation device solely because it is commonly bundled with another product.
Step 5
Design the Room for Reliable Daily Operation
Confirm bench depth, equipment clearance, power quality, network access, lighting, ventilation, water needs, temperature limits and storage before finalizing equipment. Reserve space for opening lids, loading samples, changing consumables and safe servicing. A machine that fits on paper may still be unusable if an operator cannot access the work area without crossing a dirty process.
Separate receiving and preparation from result review where practical. Keep frequently used consumables within controlled reach, and define locations for unopened stock, active lots, controls, cleaning materials, retained samples and waste. Labeling and simple visual status controls often prevent more errors than additional storage furniture.
Build quality checks into the shift
- Document startup checks, control review, cleaning and shutdown in the same order operators perform them.
- Record lot changes, expiry, storage exceptions and corrective action where they can be reviewed.
- Define when a result is held, repeated, reviewed manually or referred externally.
- Train more than one operator and retain a downtime referral path for critical tests.
- Review result quality and workflow delays after launch, not only during installation.
For larger or higher-scope diagnostic laboratories, the WOAH guidance on managing veterinary diagnostic laboratories emphasizes biorisk management, quality assurance, training, maintained equipment, continuity and full cost allocation. A small clinic should scale those principles to its test menu and local requirements rather than copying a public-sector laboratory structure.
Step 6
Match the Setup to Clinic Size and Case Mix
Clinic size alone does not determine the equipment list. A compact emergency practice may need faster in-house testing than a larger appointment-based clinic. Use case mix, peak sample volume, referral access and staffing to choose the operating level.
| Planning level | Best fit | Typical focus | Main risk to control |
|---|---|---|---|
| Essential | Lower-volume clinic with reliable referral access | High-frequency tests, microscopy and basic preparation | Buying equipment that remains idle |
| Expanded | Busy general practice or hospital | Broader sample workflows, stronger reporting and stock control | Bottlenecks between preparation and analysis |
| Resilient | Emergency, multi-shift or high-dependency service | Capacity, trained backup staff and defined downtime routes | Single points of failure during urgent care |
Keep adjacent clinical systems outside the lab budget
Step 7
Budget the Whole Workflow and Add Capacity in Phases
Compare proposals using the same time period and workload assumptions. Capital price is only one line. Include installation, room work, accessories, controls, consumables, maintenance, software, training, verification, staff time, waste, expected repeats and service during downtime. A lower purchase price may not be the lower operational cost if it adds preparation steps or depends on supplies that are difficult to replenish.
Phase 1
Core decisions
Launch the high-frequency tests that change same-visit care, plus the sample preparation and quality controls they require.
Phase 2
Workflow depth
Add microscopy, broader sample types or reporting tools when staff competency and demand are established.
Phase 3
Capacity and resilience
Expand throughput, add backup routes or bring selected referral tests in house when volume supports the change.
Before requesting quotations, turn the plan into a short requirement sheet: test menu, specimen types, daily and peak volume, turnaround target, room conditions, data needs, destination, training expectations, documentation needs and proposed launch date. That gives suppliers a common basis for comparison and reduces assumptions hidden inside a price.
Step 8
Use One Supplier Checklist for Every Proposal
A quotation is easier to compare when each supplier answers the same operational questions. Request written answers and attach them to the equipment review.
- 01
Which specimen types, test workflows and report outputs are included in the proposed configuration?
- 02
Which consumables, controls, accessories and preparation tools are required for routine operation?
- 03
What room, power, network, temperature, ventilation and bench-clearance conditions must be provided?
- 04
What training is included for operation, maintenance, result review and troubleshooting?
- 05
How are software updates, service response, replacement parts and downtime support handled?
- 06
Which product documents and market-specific requirements can be confirmed for the destination?
Decision rule
Do not approve the proposal until the test menu, installed scope, recurring supplies, training, support and acceptance process are written in one reviewable package.
FAQ
Veterinary Laboratory Setup Questions
What equipment should a small veterinary laboratory buy first?
Start with the tests that affect the most frequent clinical decisions. A small in-house laboratory commonly prioritizes a defined analyzer workflow, microscopy, centrifugation and basic sample preparation before adding lower-volume capabilities. The exact sequence should follow the clinic's caseload and referral access.
Should a clinic choose equipment before planning the room?
No. Equipment selection and room planning should be developed together because power, ventilation, water, network access, bench depth, storage and waste handling can change the usable equipment shortlist.
How should veterinary laboratory budgets be compared?
Compare total workflow cost rather than equipment price alone. Include consumables, controls, maintenance, training, software, sample preparation, installation, downtime planning and the staff time required for each test.